Archives de catégorie : Charge Doctor

Voltage threshold on Charge Doctor

The Charge Doctor autocut default settings are current mode & 1.0A threshold (charging is cut when current drops below 1.0A). This corresponds to a 90% charge, in general. Autocut by current is a handy mode and is ok for most users because when using the CD on wheels with different battery voltages, there is no need to readjust the threshold.

But there are cases when autocut by voltage is preferable:

  • on big batteries, eg > 560Wh, a 1A threshold corresponds to 95% even 99%! A threshold of at least 3A would be needed to cut at 90%, which is of course impossible using a single 2A charger (no problem using a CD-double-input and two chargers though)
  • on even bigger batteries (eg >1000Wh, Dualtron, MSuper3…), the wheeler would like to cut charge only to 70%, even 50% to best preserve the battery. Such charge levels are in the constant current phase so autocut by current is not possible

To set the threshold in autocut-by-voltage mode, use the following approximation (for LiIon cells only) : 3.3V/cell for 0%, 4.2V/cell for 100%. Some calculations based on those values are in table 1. Those are just calculations, to adjust accurately the threshold, follow the steps described previously.

Cells 0% 30% 60% 70% 80% 90% 100%
Total discharge cycles* 1800-3600 1200-2400 950-1900 700-1400 500-1000 300-600
Hoverboard 10 33.0 35.7 38.4 39.3 40.2 41.1 42.0
Duatron 14 46.2 50.0 53.8 55.0 56.3 57.5 58.8
Ninebot 15 49.5 53.6 57.6 59.0 60.3 61.7 63.0
Generic 16 52.8 57.1 61.4 62.9 64.3 65.8 67.2
Inmotion/ GW1600Wh 20 66.0 71.4 76.8 78.6 80.4 82.2 84.0
Table 1: voltage threshold to set into the Charge Doctor as a function of % charge, values in Volts
* calculated from Battery University‘s thumb rule : number of cyles doubles with  14% less charge

Examples :    

  • 30% charge is used for battery storage
  • Charging to 80% instead of 100% more than doubles the number of cycles, to 700-1400 instead of 300-600
  • On the Dualtron, set threshold to 55.0V for a 70% charge
  • On the Inmotion, set threshold to 80.4V for a 80% charge.

Datalogging on MAC

Some newer mac os x versions may be in conflict with USB dongle’s driver (chipset = CH340) leading to a computer crash when the dongle is inserted in any USB port. The problem is solved by removing the old driver and installing a new one (more details and help here or here).
A functional setup should see data coming from the Charge Doctor, check it using an ascii console set at 9600 bds.


ascii data from the Charge Doctor

Data can be plotted using a grapher, for example « Plot2 ». Probably not the best one because of its un-intuitive and ugly user interface but still good enough for the purpose. A free version exists (with some nag screens) and is downloadable from the App Store.


graphic display of data by « Plot2 »


attribution : images & data by Henrik M.

6A charger with the Charge Doctor

Electric scooters usually have high Ah batteries to make up for lower voltage compared to unicycles’ batteries. Dualtron scooters for example have 11Ah, 15Ah even 22Ah batteries! Charging at 2A with a single generic charger then becomes quite long.
Quick charging can be done using a multi-socket collector to connect up to 3x 2A-chargers, allowing more than 6A charge currents. For a 11Ah-battery, 6A corresponds to a 0.55C charge, so even such high current can still be considered a « soft » charge (recommanded charge current)).


Multi-socket collector « Minimotors » for Dualtron, with 3 inputs

The Charge Doctor-duo can be used to connect up to 3 (even 4) chargers after a very simple, quick and free mod. While allowing fast charging, it also comes with the usual intelligent features: display of V, I, Wh, Ah, datalogging and most especially automatic charge-ending to prolong the battery life.

N.B. For Dualtron scooters, order the Charge Doctor on the Buy page, version reference = « Charge Doctor V2 DOUBLE INPUT for Airwheel, Solowheel, Firewheel ».

Steps*

1) dismount the connectors of chargers 1 and 2
2) desolder charger 2 and solder its wires in parallel to charger 1
3) chargers 1 and 2 are now connected to one ouput connector to make a « double charger 1&2 » delivering 2x2A= 4A


Charging at 6A with the Charge Doctor, connexion scheme

Charge current
Wiring
2 A charge 3 alone
other option : double charger 1&2 with only charger #1 powered
4 A double charger 1&2
6 A charger 3 + double charger 1&2

*detailed steps


disassembled connector


chargers #1 and #2 soldered in // to the same connector


double charger 1&2 connector

Charge Doctor mixte for Ninebot

Ninebot uses two types of connectors for it wheels, Lemo and GX12.

Wheel = Ninebot One
Connector = LEMO
Wheel = Mini Pro, Mini Xiaomi…
Connector = GX12 – 4 pins

Batteries of Ninebot wheels are of type 15S (15 cells in series), odd value since the majority of unicycles use 16S batteries, except InMotion and some Gotway wheels with 20S batteries. Not so odd after all but more probably a marketing ploy from Ninebot to make its products in-compatible with others’ in order to charge eye-watering prices for spare parts (batteries & charger).

What’s nice however is that apart from the difference in connectors, the chargers are the same, meaning a Mini Pro charger can be used on a Ninebot One and vice-versa, with the good adapter. A version of Charge Doctor mixte for Ninebot has been made precisely for that, allowing lots of connection combinations :

  • Mini Pro charger -> Mini Pro
  • Mini Pro charger -> Ninebot One
  • Ninebot One charger -> Ninebot One
  • Mini Pro charger + Ninebot One charger -> Ninebot One (fast charging at 4A)
  • etc …


Charge Doctor mixte for Ninebot


Charge Doctor mixte for Ninebot, connector types

Charging NinebotOne with NinebotOne charger (white charger) : current = 2.00A


Fast charging NinebotOne with NinebotOne charger (white charger) + MiniPro charger (black charger) : current = 4.08A

images attribution: jvincent, espritroue.fr

Charge Doctor V2, firmware V 2.03

Firmware V2.03 adds importants features to Charge Doctor’s V2.02. Please refer to this user manual for all CD shipped after June 2016, it replaces the now obsolete initial manual.

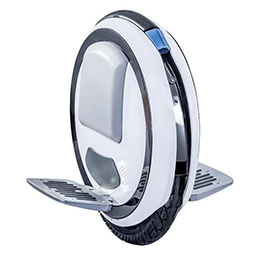
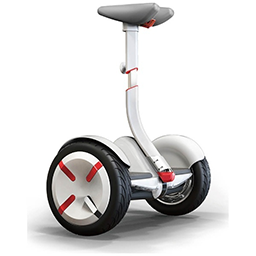
The CD is now available for a large range of electric wheels, from unicycles to hoverboards, bikes, scooters… It also exist in « mixte » versions for use on different models by the same CD (eg. Ninebot & Gotway). Here is a list of (non exhaustive) CD-compatible electric wheels :

  • Airwheels & clones, King Song, Gotway, Solowheel, Firewheel, Dolphin, Pinwheel…
  • Gotway 84V (GX16 4 pin connector)
  • IPS (GX16 4 pin connector)
  • Ninebot One (Lemo connector) an Minipro (GX12-4 pin connector)
  • InMotion V3 & V5 (Lenovo square socket) and V8 (GX12-3 pin connector)
  • Hoverboards
  • Scooter with XLR-3 pin connector or GX16-3 pin connector (GTX, Dualtron, Speedway,…)

Image

Charge Doctor V2 features

  • Voltage: 20.0V – 100.0 V
  • Current : 0.00 – 10.00 A
  • Charge : 0.000-1000 Ah with automatic decimation
  • Energy : 0.0-10000 Wh with automatic decimation
  • End-of-charge by current threashold (0.1-8.0 A) or voltage threshold (30.0-85.0V)
  • Datalogging serial output 9600 bauds TTL
  • Dimensions : 85x50x20 mm
  • Weight : 65 g

Usage

At startup, displays « C-Dr » (blue) and firmware version « 2.03 » (red).

Image

Top display shows alternatively voltage (« 61.9U ») and current in amps (« 1.99A »).

Image Image

Bottom display has 3 display screens:

Short click => screen change
1. Wh
2. Ah : « Ah » alternates with value to differentiate from Wh mode
3. Auto-shutdown threshold ( flashing display)
Long click
1. & 2. reset Ah and Wh counters
3. Enable/disable auto-shutdown (« —A » = disabled).
N.B. auto-shutdown threshold can
only be changed in « adjustment » mode
Image Image Image
screen 1: 148.2 Wh screen 2: 2.377 Ah screen 3: auto-cut threshold
short click =>change to screen 2
long click => Wh, Ah = 0
short click =>change to screen 3
long click => Wh, Ah = 0
short click =>change to screen 1
(automatically back to screen 1 if no click for more than 6s)

Screen 3 has 3 modes, press long click to change mode :

Image Image Image
screen 3 / mode 1 screen 3 / mode 2 screen 3 / mode 3
auto-cut when current is below threshold (1.20 A)

auto-cut disabled (use this mode to charge to 100%)

charge has been auto-cut (« off »). To resume charge, press long click or restart the CD by disconnect/connect charger

Easter egg: press 3 short clicks (interval < 0.3 between clicks) to turn off LED display
In display-off mode, the CD continues to work normally. Another click restores display


Adjustement

Enter adjustment mode by holding the button when powering on.
1) mode auto-shutdown, threshold adjustment : button hold < 5s
2) mode voltage & current calibration : button hold > 5s

1) Adjustement of auto-shutdown threshold

Top led displays current parameter. With no button click, the screen is cycled through 3 avaibles parameters every 2s. Any click holds up the actual parameter 6s for adjustment before the cycling restarts. Adjustment mode is terminated and the CD gets back to normal mode if no click for more than 10s.

Image 3 available parameters:

  • Auto : auto-cut
  • Pr1 : parameter 1, display off at auto-cut
  • Pr2 : parameter 2, auto-cut mode by current or voltage

« Auto » : auto-shutdown mode. Bottom led displays the shutdown threshold. When the threshold is reached, current is cut by the CD and the charge session is ended (I=0.00A). The threshold is incremented by 0.1A steps (auto-cut by current mode) or 0.1V steps (auto-cut by voltage mode). Hold the button for fast then ultra-fast increment. Voltage and current threshold are stored in separate non-volatile memories.
Important: disabling auto-cut can not be done in « parameter mode » only in normal mode (see above).

« Pr1 » : parameter 1. Value = 1 => deep standby mode with Led display off at auto-cut. To power on, click button or disconnect/reconnect the CD.

« Pr2 » : parameter 2. Available values, « dn A », « up V », « dn V »

Image Image Image
dn A : down A, auo-cut when charge current is below threshold. Default mode at first use.

UP V : auto-cut when charge voltage is above threshold. This mode generally allows more accurate auto-cut, to be used on big batteries (>560Wh) when auto-cut by current doesn’t have enough resolution.

dn V : down V, auto-cut when voltage drops below threshold. To be used only for discharge tests.


2) Calibration

Voltage and current are calibrated at +-10mV and +-1mA respectively before shipping. Avoid recalibration unless you have accurate instrumentation.

Top led displays actual parameter. With no button click, parameters changes every 2s in a round robin schedule for all available parameters. Any click keeps the actual parameter 6s before the round-robin restarts. To quit this calibration mode and revert back to normal mode, power-off then on Charge Doctor.

Image
« down U » : decrease voltage gain
(about 10mV per click)
Image
« UP U » : increase voltage gain
Image
« down A » : decrease current gain
(about 1mA per click))
Image
« UP A » : increase current gain
Image
« 00 A » : change current offset to calibrate 0.00A
ATTENTION : connect no charge (zero current) and hold button 2s to calibrate (short click is ignored to filter out manipulation error)

Data logging

Charge-Doctor transmits data every 10s by serial 9600 bds protocol, TTL level, 8 bit data, 1 bit stop, no parity. Data are in ASCII format with separator = coma. The format is identical to the first version Charge Doctor, see the blog’s article on Graphic Display for steps to download and process data in realtime.
N.B. Charge Doctor does not store data. For data logging, a PC must be connected during all the charge record.

Connection to dongle : the Charge Doctor’s output Tx must be connected to the serial-USB converter dongle’s input Rx :
Image

Image

IMPORTANT : at power-up, Charge Doctor sends a 2 line header containing various information such as the firmware version :

Charge Doctor V2.00-10A by HMC 01/2015
Time(s) Voltage(x0.1V) Current(x10mA) Charge(x0.1Wh)

These two lines will be recorded in file « log.txt » but they are not parsable by the grapher KST so the realtime display will stop : KST is quite pricky as to the data format and any error will stop the graph updates. Data and graph should change in realtime in KST when new data is logged into « log.txt » by datalogger.exe so if KST’s display freezes, then « log.txt » contains errors. To remove errors, quit KST and edit « log.txt » using a text editor.

The ininterpretable header lines can be removed from « log.txt » by two methods :

  • restart datalogger.exe 2 secondes AFTER restarting Charge Doctor so the header gets lost and not logged
  • Click « Stop logging », UNcheck option « Append to file » then click « Start logging » in datalogger.exe => old file « log.txt » is deleted and replaced by a new blank file for logging, hence, without the uninterpretable header.

Pictures of Charge Doctor V2, versions with GX16 connector (most electric monocyles, bike, hoverboard, bikeboard) and Lemo connector (Ninebot monocycle).
(click picture for high resolution image)

Image

Image

What is the recommended charge current ?

Now that the Charge Doctor 10A V2 is available, the question of charging at 4A or more has been frequently asked. A higher charge current reduces charging time but does it reduce the lifetime of the battery?
Answer: it depends on the battery’s « 1C » value.

Electric unicycles use 56V batteries (16 LiIon cells Vnominal = 3.6V), the correspondence between Wh and « 1C » value in Ah is given below (for hoverboards or other electric bicycles with 42V or 36V batteries, recalculate 1C = Wh / voltage):

Battery capacity
« 1C » value
Example of wheel
130 Wh 2.2 Ah Solowheel, Airwheel, NineBot
260 Wh 4.5 Ah Firewheel 260, Gotway, Kingsong
520 Wh 9 Ah Firewheel 520, Dolphin
680 Wh 12 Ah Gotway, KingSong

If 1C value is 2Ah, a « 1C charge » means charging at 2A.

It is a convenient normalisation to determine wether the charge current is too high or not, and thus its impact on the battery’s lifetime.

  • 2C charge is a fast charge. It is not recommended (it can apply in RC model world but on LiPo batteries, not LiIon).
  • 1C charge is acceptable but may decrease the battery lifetime. A lot of electric unicycles have 130Wh batteries (Solowheel, Airwheel X3 et clones, Ninebot E…) so they are charged at 1C by a 2A standard charger.
  • 0,5C charge is a slow charge and may be a good compromise between charging time and battery lifetime. A 260Wh battery (Firewheel 260) is charged at 0,5C by a 2A standard charger.
  • 0,2C charge is considered a very soft charge.

With a 680Wh battery for example, a 1C charge means the charge current is 12A! So a 4A or 6A charge (by connecting in parallel a charger 4A + charger 2A or 2A 3 chargers) remains a « slow » charge. Even seemingly so high currents should not affect the battery lifetime. Of course, preserving lifetime also means avoiding overload and deep discharge, the subject of a previous post.


Fast charge with the Charge Doctor V2

The Charge Doctor V2 has a option with 2-input connectors to connect in parallel two chargers. Owners of large batteries will have more connection options (see table below) and can mount a cheap 4A charger using two standard and ubiquitous 2A chargers.
Image

Image

Connection Total current
Remark
one 2A charger
2 A
two 2A chargers
4 A
one 2A charger + one 4A charger 6 A use thicker wires*
two 4A chargers
8 A use thicker wires*

* for currents above 4A , the charging wires (between the BMS and the wheel’s charge connector) are too thin and must be replaced by thicker wires.

Case study of a Firewheel 260Wh fast charge

The battery is a 260Wh type and is empty (ridden until pedals tilt-up) before data measurements.

One charger connected => voltage = 61.7V ; current = 1.94AImage
Image

Two chargers connected => current = 3.95AImage
Image

The charging curves were sampled using the Charge Doctor’s serial output. The 4A charging graph can be compared to a 2A graph of the same 260Wh battery. Charging from empty to 90% capacity lasts about 1 hour, meaning charge time has been divided by 2!Image

mark capacity/Wh % total capacity voltage /V current /A observation
0 0 0% 67.3 0 one charger connected
A 0 0% 57,4 2,03 start of charge
B 3,9 0% 60,0 3,99 second charger connected
C 152,8 58% 66,3 3,89 end of constant current phase
D 211,0 80% 67,1 1,84 current <2A => one of the chargers has desactivated by itself
E 244,8 93% 67,5 0,70 auto-shutdown by Charge Doctor, cut threshold = 0.7A
F 244,8 93% 67,5 0,81 manual power-on to charge until 100%
G 263 100% 67.5 0,03 charge termination, disconnection
  • Note 1: when connecting the second charger (A-> B), the internal resistance of the battery can be estimated from the voltage jump : R = deltaV / deltaA = (60-57.4) / (3.99-2.03), or R = 1.3 ohms. It’s a rather high resistance typical of LiIon batteries (LiPos have lower internal resistance). This explains the big voltage sag I observe on my Firewheel when accelerating, with the fuel indicator dropping momentarily from 50% to 20%.
    Bigger batteries, eg 520Wh, would probably have much smaller R.
  • Note 2: setting automatic cutoff at 0.7A stops the charge session at 93% capacity, a value consistent with results from a 2A charge. The correspondence between cutoff current and % of charge seems to depends only on battery capacity, not on load current. A ballpark value would be 1A threshold => 90% of charge for a 260Wh battery.
  • Note 3: charging from 93% up to 100% takes as much time as charging from 0% to 93%, so the last drops of charge are usually not really worth it.

Warning: in theory, connecting two chargers in parallel poses no risk to the chargers. At least, on the chargers used so far since I don’t have any negative feedback from the first users. But given the many different charger models, I can not certify 100% that it would work on your specific chargers. So to test it knowingly. Connecting chargers in parallel is a hack well worth trying for frequent riders and/or owners of large batteries> 260Wh.

Warning: Lithium batteries charging is not without risk, all the more with high currents. So do not neglect the usual precautions : do not charge without being nearby, install a fire detector, keep valuables far from the wheel, wait until the battery is cold after a ride before charging… Stick to the precaution rules and don’t let routine induce you into complacency.

Edit 20/03/2016 : add graph Gotway MSuper 850, fast charge with two 1.75A Gotway chargers. Data Thomas T.

Image

Apparently, it’s a 680Wh battery and the 850Wh nameplate value is false !

Charge Doctor V2, auto-shutdown function

For maximum battery life, it is best to avoid overdischarge and overcharge. It is generally admitted that the ideal range should be within 20% to 90% of full charge, to be kept as often as necessary, when possible, especially for happy owners of large capacity batteries like 520Wh of the Firewheel F520, even 680Wh (!) on some Gotway or KingSong wheels.

On electric monocycles or other electric wheelies (bike, hoverboard, bikeboard, gyropods…), overdischarge is avoided by the main controller board by warning and stopping. But all of them are designed to charge to full charge, which is contrary to recommanded practices above. It is nonetheless what happens with all products for obvious marketing reasons since price is in part determined by the nameplate battery capacity, which corresponds to a full charge.

The Charge Doctor V2 auto-shutdown function is precisely intended to address this inconvenience by cutting power when charge current drops under a user adjustable threshold to avoid overcharge. The auto-shutdown can of course be disabled so Charge Doctor V2 would function as any conventionnal (advanced) charge monitor.

Important : a full charge is still required occasionnaly, e.g. 1 every 10 or 20 charging sessions, to ensure the BMS ( (battery management system, the embedded battery controler board) would trigger charge balancing. Balancing, whose importance is most often exagerated, is still necessary on Lithium batteries. So plan some 100% full charges from time to time if you decide to mostly charge to 80% or 90%.

An example of charge session with auto-shutdown is described below to highlight important points of this process. It is the charge of my Firewheel F260 (batteries 16S2P, 260Wh stated capacity), datalogging is by Charge Doctor V2 and graphic display is by KST (see « Graphic Display » post for more details on how to use these tools).

The Firewheel was driven until pedals tilt-up, meaning the battery was empty before charging (voltage starts at 57.7V ie 3.6V, see « How to take care of your unicycle batteries‘). Charger is a 2A version and auto-shutdown threshold has been adjusted to 1.4A. The total datalogging duration is 3h34min30s (bottom-right number on the graph).

Image
Charge graph of Firewheel F260 with auto-shutdown at 1.4A

A : end of the constant current stage, start of constant voltage stage
B : auto-shutdown by Charge Doctor
C : charging restart (by user)
D : charging up to 100% capacity

The charge session begins by the constant-current stage at 2A, lasting about 100 minutes, until A. Then constant voltage stage kicks in : voltage remains at 67.3V and stop increasing since it corresponds to 4.2V, the maximum voltage per cell. Note that, theorically, reaching the constant voltage phase should be sufficient to trigger cell-balancing by the BMS. After point A, current drops rapidly to point B, where Charge Doctor shutdowns current automatically. At C, Charge Doctor is switched on again to resume charging to point D, where the battery is virtually 100% full.

This full charge graph leads to the correspondance table of currrent threshold – % charge below (values are taken directly from the file « log.txt »). For example, a 1.0A threshold will end charging at 90% capacity.

For 4A or 5A fast chargers and/or different batteries, thresholds are naturally different so such graph must be logged initially by the user to determine the characteristics of his personal setup.

Auto-shutdown
threhold (A)
Battery capacity (Wh) % of full charge


1.52 232.3 85%
1.40 235.6 86%
1.20 242.0 89%
1.00 245.7 90%
0.80 250.6 92%
0.60 256.0 94%
0.40 261.5 96%
0.30 264.4 97%
0.20 267.0 98%
0.10 272.7 100%

N.B. with the Firewheel charger, charge current does not drop to zero, even after hours (even after a night according to my tests). This means that the charger does not cut current at end of charge which is really bad for lithium batteries! My other chargers don’t behave like this, fortunately. Anyway, all chargers systematically charge to full capacity, which is always above the 90% recommanded level. So use the Charge Doctor V2 auto-shutdown, when you can.

Charge Doctor V2 – 10A

Charge Doctor V2 is an upgrade of the previous battery charge controller. It retains the original features of the product like a selectable charge display in Wh or Ah, user-recalibration and storage of calibration factors in eeprom, one-button user interface, datalogging by a transmit serial output. Enhancements have been added :

  • maximum current up to 10A
  • wider voltage range
  • bigger display digits
  • end-of-charge auto shutdown with adjustable current threshold

With its wider range of voltages and currents, V2 is suitable for charge monitoring of most light electric vehicules, especially electric monowheels, but also bikes, scooters, hoverboards, gyropods, e-bikeboards…

Image


Charge Doctor V2 features

  • Voltage: 20.0V – 100.0 V
  • Current : 0.00 – 10.00 A
  • Charge : 0.000-1000 Ah with automatic decimation
  • Energy : 0.0-10000 Wh with automatic decimation
  • End-of-charge adjustable current threashold : 0.1-8.0 A
  • Datalogging serial output 9600 bauds TTL
  • In/out with 3-pin GX16 aviation connector (Airwheel & clones, TG, iezWay, Gotway, Firewheel, most e-bikeboard…) or Lemo connector for Ninebot
  • Dimensions : 85x50x20 mm
  • Weight : 65 g

Usage

At startup, displays « C-Dr » (top) and firmware version « 2.00 » (bottom).

Image

Top display shows alternatively voltage (« 65.7U ») and current in amps (« 1.99A »).

Image Image

Bottom display has 3 display modes :

Short click => mode change
1. Wh
2. Ah : « Ah » alternates with value to differentiate from Wh mode
Auto ; flashing display of auto-shutdown current threshold
( auto-shutdown disabled => current = 0.00A)
Long click
1. & 2. reset Ah and Wh counters
3. Enable/disable auto-shutdown (« 0.00A » = disabled).
N.B. auto-shutdown threshold can
only be changed in « adjustment » mode

Important : after auto-shutdown, the internal switch is in OFF state and no current can pass. To enable charging again, switch ON the internal switch using either methods :

  • long click when in auto-shutdown mode (see above)
  • disconnect/reconnect Charge Doctor (internal switch is always ON at startup)

Adjustement

Enter adjustment mode by holding the button when powering on.
Button hold < 5s => mode 1) auto-shutdown current threshold adjustment
Button hold > 5s => mode 2) voltage & current calibration

1) Adjustement of auto-shutdown current threshold

Top led displays actual parameter. With no button click, parameters changes every 2s in a round-robin schedule for all available parameters. Any click hold up the actual parameter 6s before the round-robin cycle restarts.
« Auto » : auto-shutdown mode. Bottom led displays the shutdown threshold ( « 1.00A »). When charge current drops below this threshold, charging is stopped by Charge Doctor. Change by 0.1A steps by clicking the button or by holding the button
Important : disabling auto-shutdown (display = « 0.00A ») can only be done in normal mode (see above), not in adjustment mode
Image
« Pr1 » : parameter 1. Value = 1 => deep standby mode with Led display off at auto-shutdown. To power on, click button or disconnect/reconnect Charge Doctor.
Image
« PR2 », … « PRn » : future extension

If no click for more than 6s, this adjustement mode is terminated and Charge Doctor reverts back to normal mode.

2) Calibration

Voltage and current are calibrated at +-10mV and +-1mA respectively before shipping. Avoid recalibration unless you have accurate instrumentation.

Top led displays actual parameter. With no button click, parameters changes every 2s in a round robin schedule for all available parameters. Any click keeps the actual parameter 6s before the round-robin restarts. To quit this calibration mode and revert back to normal mode, power-off then on Charge Doctor.

Image
« down U » : decrease voltage gain
(about 10mV per click)
Image
« UP U » : increase voltage gain
Image
« down A » : decrease current gain
(about 1mA per click))
Image
« UP A » : increase current gain
Image
« 00 A » : change current offset to calibrate 0.00A
ATTENTION : connect no charge (zero current) and hold button 2s to calibrate (short click is ignored to filter out manipulation error)

Data logging

Charge-Doctor transmits data every 10s by serial 9600 bds protocol, TTL level, 8 bit data, 1 bit stop, no parity. Data are in ASCII format with separator = coma. The format is identical to the first version Charge Doctor, see the blog’s article on Graphic Display for steps to download and process data in realtime.
N.B. Charge Doctor does not store data. For data logging, a PC must be connected during all the charge record.

Connection to dongle : the Charge Doctor’s output Tx must be connected to the serial-USB converter dongle’s input Rx :

Image

IMPORTANT : at power-up, Charge Doctor sends a 2 line header containing various information such as the firmware version :

Charge Doctor V2.00-10A by HMC 01/2015
Time(s) Voltage(x0.1V) Current(x10mA) Charge(x0.1Wh)

These two lines will be recorded in file « log.txt » but they are not parsable by the grapher KST so the realtime display will stop : KST is quite pricky as to the data format and any error will stop the graph updates. Data and graph should change in realtime in KST when new data is logged into « log.txt » by datalogger.exe so if KST’s display freezes, then « log.txt » contains errors. To remove errors, quit KST and edit « log.txt » using a text editor.

The ininterpretable header lines can be removed from « log.txt » by two methods :

  • restart datalogger.exe 2 secondes AFTER restarting Charge Doctor so the header gets lost and not logged
  • Click « Stop logging », UNcheck option « Append to file » then click « Start logging » in datalogger.exe => old file « log.txt » is deleted and replaced by a new blank file for logging, hence, without the uninterpretable header.

Pictures of Charge Doctor V2, versions with GX16 connector (most electric monocyles, bike, hoverboard, bikeboard) and Lemo connector (Ninebot monocycle).
(click picture for high resolution image)

Image

Image

How to take care of your unicycle’s battery

Most unicycles use 16 LiIon battery cell packs. There are a few variants, InMotion battery has 18 cells, Pinwheel uses Lipo batteries, first generation Solowheels have LiFePo batteries, so the thresholds listed below are to be adapted but the operating principle remains unchanged.

All batteries have a BMS board (battery management system) to manage the cells, especially to balance the voltages of 16 cells and to automatically shut off charging current to prevent overcharge. A large majority of BMS also features overdischarge protection by cutting off power (without warning !!!), a horribly faulty design responsible for countless accidents, sometimes serious, see this blog’s BMS many articles.

Note that according to Shane Chen himself, Solowheel’s founder and popularizer of the electric unicycle concept, his BMS never cuts off power during a ride (vital requirement for an unicycle!). If the battery has a problem, the BMS just reports it to the mainboard thanks to a dedicated signal wire, the only reasonnable thing to do.

Battery capacities

To double the capacity of a 16S1P battery pack, an additional cell is welded in parallel to each existing cell to make a 16S2P (16 series or 2 parallel cells). Smallexis made such mod for his Airwheel Q3 battery, find it with the « search » button). To triple the capacity, add two cells (16S3P), to quadruple, add 3 cells (16S4P eg on the Firewheel 680Wh). The most common variant is two parallel packs, each with its own BMS, eg two packs 340Wh in parallel to have a capacity of 680Wh (Gotways).

Important thresholds

Here are some important values for a ??LiIon pack. They are useful to know to charge & discharge properly, to make a quick diagnosis in case of the wheel’s power supply problem and to monitor battery (inevitable) aging.
Values are for cell and pack (1 pack = 16 cells in series, values ??measured by the Charge Doctor )

Note V cell V pack Threshold
1 3.0 48 Quick deterioration
2 3.2 51 Minimum, avoid going below
3 3.45 55 Stop limit on most wheels
4 3.6 58 Storage voltage
5 3.7 60 For calculating the nominal value Wh
6 4.0 64 Open circuit after full load
7 4.1 66 Balance triggering by BMS
8 4.2 67.2 Constant voltage charge threshold

(1) the battery may not be destroyed by such a low voltage, it only « takes a hit ». This is a deep discharge state. Avoid at all costs !
(2) this limit is normally never reached because the wheel’s mainboard emits low voltage warnings (buzzer and/or pedals tilt-up) and forces the rider to descend before. If you have this value or lower, then your package has a problem, usually some defective cells.
(4) indicative value, may vary. Use this value to get 50% charge state for storage (a Charge Doctor counting capacity from voltage and current would be much more accurate). The goal is not to store the battery neither full (high voltages tend to stress the cell’s electrolytes separation membrane), nor empty to avoid self-discharge from deeply discharging the battery (see (1)).
(6) after the load, open circuit (no load) voltage tends to sag, especially if the battery is old.
(8) constant voltage charging zone: the charge current gradually decreases. When it is below a few tens of mA, the load is automatically switched off by the BMS. It can also be manually turned off by the user when the red LED on the charger switches to green, which corresponds to a charging current less than 0.25A. At this point, the battery is almost 100%, keeping on charging is unnecessary because only a few Wh would be added.
(8) The voltage at the charging socket (read by the Doctor load) may be 68V due to the BMS’s voltage drop, especially the reverse voltage protection diode.

Charge profile example (Firewheel 260 Wh)

Preserve the pack

  1. It is preferable to not charge more than 90% (even 80%), nor to discharge to less than 10% of the nominal capacity in order of the reduce stress to the battery. It’s not always possible with low capacity batteries (eg 130Wh) so if you have a beefy battery, just do it.
    A 100% charge or discharge to 0% results in a more stress to the electrolyte separation membrane and the electrodes respectively and reduces the number of usefull charge / discharge cycles. A LiIon battery does NOT like overcharge.
    Most of the times, it’s OK to stop charging when the current drops below 1A on a 2-ampere chargers (see graph). For discharge, the wheels stop early enough by raising the pedals so that we do not have to worry about a deep discharge.
  2. If the wheel is not used for a long time, eg more than a year, the battery should be voltage monitored and if necessary recharged to 50% to compensate for self discharge. However, LiIon battery’s self-discharge is very small (compared to NiCd or NiMh batteries) so checking it every year is enough.
  3. Log at least once the battery charging curve (using the Charge Doctor) and store it for later comparison in case of problems or to find the battery aging conditions after a few months or years of use. The reference curve gives a lot of important information, including how to determine the duration for charging to 90% (read the voltage at the beginning of charge, place the point on the curven use the x-axis to determine the time it takes for current fall below 1A, and use this duration to end the charge).